Showing posts with label vegan. Show all posts

Tuesday, February 14, 2012

Stress Wars

I know. Don't yell at me! It's been forever since I've blogged. Call it a Happy Valentine! Believe me, it hasn't been without remorse. I'll admit there were days i was just lazy or not in the mood to write. And then, there were days that all I wanted to do when I got home was crawl into bed and sleep for hours. And other days when I woke up at 4 am and yet couldn't seem to function enough to do anything. That's what this darn winter term has done to me!!!!! Somehow professors have decided that 8 page papers are okay to give the week before finals, 40 minute presentations are not unreasonable, and you can speed up on harder material just to squeeze it all in and meet your quota.

Yeah.

Oh, and then it's also okay to deny someone who has been actively looking for a job for two months an opportunity for a job she really, really tried for....?

Sorry, it's not like me to be this way.... Maybe it's the AntiCupid playing tricks on me!

So why don't we all digress back to my favorite topic- some tasty food. Of which, I've made a lot of this month, even if they haven't all made it to paper. Here's a taste:

Vegan Gibassier (if you've never had a gibassier- go and get yourself one right now! They are light, yeasty, flowery puffs of heaven with sweet, candied orange and anise flavors that don't overpower each other or the nature of the bread itself. Thanks to Portland for providing a home for this treat and leading me to it at Pearl Bakery!)


Cherry Splits - Black and whites with a whole lot more flavor and valentine flare!


Loverberry Cheesecake - Yes! A soy-free, vegan cheesecake that is soooo good! Sorry, I ate it too fast to capture a photo!!!!


Oh and then there is Daring Cooks, which I'm participating in for the first time this month, so you'll get a small taste of savory inspiration too.

This month the Daring Cooks theme is: patties. The Daring Cooks’ February 2012 challenge was hosted by Audax & Lis and they chose to present Patties for their ease of construction, ingredients and deliciousness! We were given several recipes, and learned the different types of binders and cooking methods to produce our own tasty patties!


For my part, I decided to make the Potato Rosti (partly because it was the easiest to veganize, and the least expensive). To be honest, I didn't have great expectations. I mean, sure, I've had potato pancakes before, and that's basically what this was- big pancakes. Except that they were soooo much better! Seriously. Try some. And make sure you really do get at least a kilo of potatoes - I only had half, and i could barely keep from eating both of    the two small cakes I made! I also added some Zaatar (my new favorite spice) for extra flavor.


Another tip- when the recipe says to squeeze / press out all the water, DO NOT skimp on this step! I ended up with a bunch of liquid in my bowl that came out while I waited for my pan to heat. AS long as you drain that liquid, you'll be fine, but it's a lot easier if you can 
press it out first!


Potato Rösti

Servings: makes two large rösti
adapted from a family recipe
The classic rösti; cheap, easy and so tasty.
Ingredients:
1 kg (2½ lb) potatoes
1 teaspoon (5 ml) (6 gm) salt
approximately 2 teaspoons Zaatar, optional
2 teaspoons (10 ml) (6 gm) black pepper, freshly milled
1 1/2 tbsp. EnerG egg replacer mixed with 2 tbsp. water
2 tablespoons (30 ml) (½ oz/15 gm) cornflour (cornstarch) or use all-propose flour
3 tablespoons (45 ml) oil, for frying
Directions:
  1. Grate lengthwise the peeled potatoes with a box grater or a food processor.
  2. Wrap the grated potato in a cloth and squeeze dry, you will get a lot of liquid over ½ cup, discard liquid since it is full of potato starch.
  3. Return dried potato to bowl add the egg, cornflour, pepper, and salt.
  4. Mix until combined.
  5. Preheat a frying pan (cast iron is best) until medium hot, add 2 teaspoons of oil wait until oil shimmers.
  6. Place half of mixture into the pan, flatten with a spoon until you get a smooth flat surface. Lower heat to medium.
  7. Fry for 8-10 minutes (check at 6 minutes) the first side, flip by sliding the rösti onto a plate then use another plate invert the rösti then slide it back into the pan, then fry the 
  8. other side about 6-8 minutes until golden brown. Repeat to make another rösti
I served mine with some Vegetarian Bolengese from Vegetarian Times. Yummy!!!


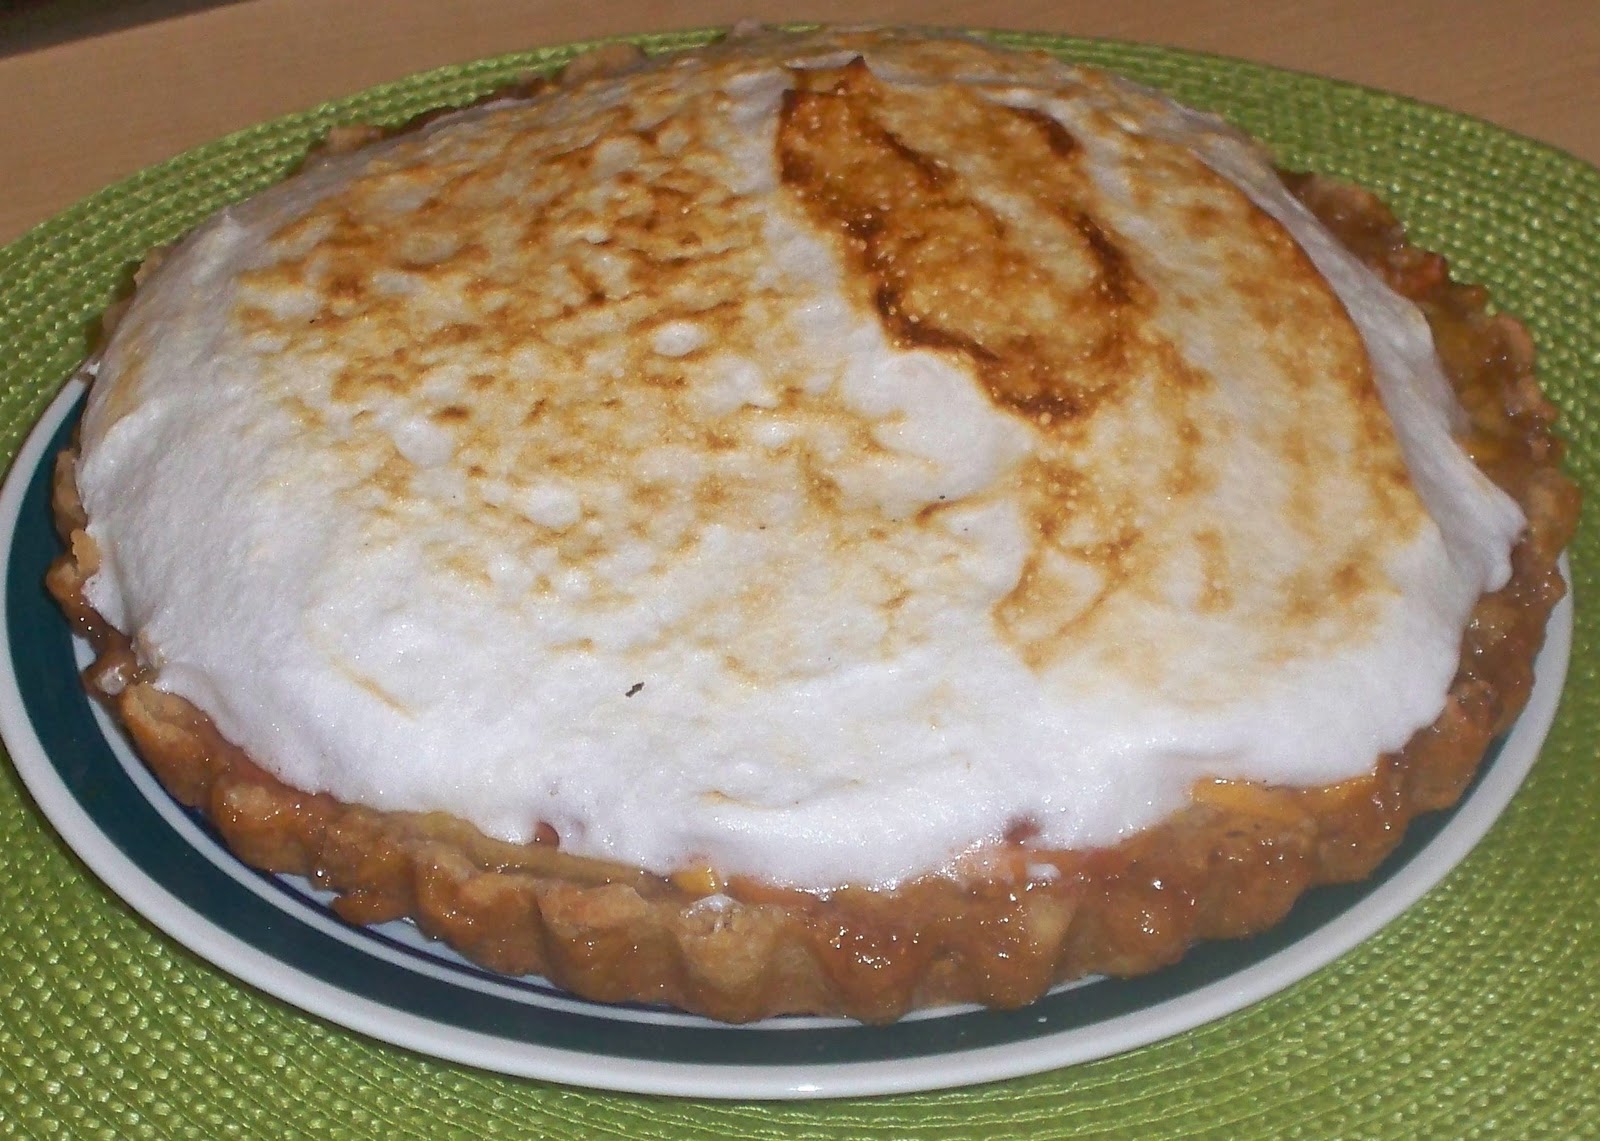
And now, for an extra bonus, I'll give you the recipe for my cheesecake!


Loverberry Cheesecake

Your favorite crumb crust, baked for 10 minutes in a greased 9" spring form pan in a 350 degree oven.
/2 tsp. vanilla
Lower oven temp to 325.
2 cups "Incredible Almond Creme Cheez" from The Ultimate Uncheese Cookbook by Jo Stepaniak, pg. 42 (or you can use any vegan cream cheese you like, I just wanted mine soy-free)
150 g. granulated sugar
1 1/2 tsp. vanilla
10 oz. coconut or almond milk yogurt
2 tbsp. tapioca starch
pinch of salt
approximately 1/2 cup good-quality blueberry jam

Cream the "cheez" and sugar together in a mixer on medium speed until smooth. Add vanilla and yogurt. Once combined, add starch and salt, mixing just to incorporate.
Pour filling mixture into the baked crust.
Dot the top of the filling with blueberry jam. If you want to swirl the jam, you may want to heat it up so it's more liquid and can be moved around. Otherwise, you can let the dollops of jam sink to the bottom and create its own layer on top of your crust.
Bake in preheated oven for 65-80 minutes, or until almost set. Cool completely, then chill thoroughly, for at least 4 hours, before serving.


More recipes and food inspiration to come soon, I promise! First I need to put this trimester behind me, and my teenage years for that matter! That's right, I'll be turning 20 in... 16 days!

Sometimes I feel so much older than that!

No matter, I've got lots to do and think about in my 20th year, and i'm excited to get it started. It will start with a new blog.. can't have pastryteen for a 20 year old, now can we? No worries though, I'll keep you updated! Thanks for 2 years of loyal reading!

Tuesday, January 3, 2012

New What?

So you know how I had all those hopes and aspirations a few days ago?
Well, its only January 3rd and I'm already having a tough time with them.
First of all, I hate exercise. I know everyone does, but I triple hate it, and it doesn't get any better form the moment I start to the moment I'm done and then have to think about having to it again the next day or the day after that.
Ugh!
And then there's the fact that I'm kinda on edge. After all, I do have two papers to write over this two week break, and this writer is having a hard time with them.
And then there's the fact that I feel bad I can't drive or do something that would actually help my family get things done right now, aside from feeding them.
Which is exactly what I've been doing today. With some family matters to take care of, the end of my vacation is quickly going down hill, so I exhausted myself with chocolate tweed angel food cake, rich chocolate cheesecake that, even though it's not vegan, I couldn't help but take a tiny taste- yum! And then some surprisingly delicious non-meat loaf and broccoli mac and cheese (I knew that would be good, thanks to this recipe on Vegan D.a.d.).
How did I manage to do all this, work out, and write 2 pages of a boring economics paper and a very jumbled page of vegan history?
I'm not sure. Though I did have a good breakfast!
Coconut Raspberry Bran muffins.

That's right. Bran muffins. But these aren't your ordinary, dense, diet-food muffins. These have no Raisin Bran or any boxed cereal. These have coarse, mealy bran, oatmeal, tons of sweet, nutty, toasted coconut, and a handful of frozen raspberries to freshen things up.

And they're mini. So I can pop 3 or 4 of them without a speck of guilt.

Good thing, too, cause there are still not-so-petite petit fours in the drawer and a plethora of ideas to feed my sweet tooth tomorrow. Gotta have something healthy.

Mix some up for yourself- they're a cinch. The hardest part is dissolving the agar. Yes, I said agar. Thanks to Vegan Cupcakes Take Over the World, I learned that agar makes a more tender, unified crumb in cake-like baked goods (well, or so I assumed; what applies to a cupcake should apply to a soft, billowy muffin). Anyway, after that, all you have to do it mix everything together, pop them in the oven, and you'll have fresh-baked muffins in a matter of minutes.


Tropical Blush Bran Muffins


1/2 cup sweetened shredded coconut
1/2 cup unsweetened coconut flakes or shreds

539 g. coconut milk or your favorite non-dairy milk
2 tbsp. agar flakes
1/2 cup Miller's Bran
1/2 cup oatmeal

2 tbsp. flax seed meal
200 g. raw sugar
150 g. oil

1/2 fresh grated ginger (ground is okay in a pinch)
1 tsp. vanilla
1 tsp. baking soda
2 tsp. baking powder
1 tsp. salt
130 g. all purpose flour
130 g. whole wheat pastry flour
1 cup frozen raspberries

1. Preheat oven to 350 degrees. Toast both kinds of coconut while the oven is preheating, until all coconut is golden.
2. Line muffin tins with paper liners. The recipe makes about 30 mini muffins, or 10-12 regular size muffins.
3. In a saucepan, combine coconut milk and agar flakes. Bring to a boil, then simmer for 10 minutes, or until agar dissolves. Remove from heat and add bran and oatmeal.
4. Cool oat mixture to room temperature, then add flax seed meal, sugar, oil, ginger and vanilla. Mix well to emulsify oil.
5. Combine all dry ingredients. Fold into the oat mixture.
6. Fold in the raspberries, being as gentle as possible so as to not squish the berries.
7. Scoop into prepared muffin tins, filling 3/4 of the way full. Bake in preheated oven until set and golden. For mini muffins, this will take about 11-13 minutes. For regular size, it will probably tkae 20-25 minutes.
8. Cool completely, then store in an airtight container or serve.


Having these in the house is a reason to go to bed- just to wake up and have a delicious breakfast! That, and the fact that these words are blurring before my sleepy eyes ;)

Saturday, December 3, 2011

Wishful Thinking

I've been doing a lot of wishing lately. Wishing for summer. Wishing for a job. Wishing for Portland and an even better job. Wishing for some messages in my Etsy mailbox. Wishing for sweets.


Ok so that last one is relatively achieveable. After all, I did just make cookies. But there are certain sweets, parts of Christmas, memories I wish to recall. Traditions that just aren't the same any more. Childhood that can't be reclaimed, yet adulthood that can't come fast enough.


Story of my life.


And then there's cherries. And marshmallows. Both of which I'm suddenly craving. And can't have. Cherries - the juciest, frehsest ones - aren't in season at Christmas (though they should be - they are the perfect festive-looking fruit)
Marshmallows - are hard to find - and, more importantly, make - vegan.


Allow me to take you on a sensual adventure through the seasons.

The joys of summer are endless. The warm breezes blowing through my hair like fairy dust. The sunlight invigorating my senses like comfort food. The farmers markets that are, too late, making their way to Connecticut. The hours swimming in sea-blue water of soy sauce. One of the best things about summer is the bounty of sweet, juicy fruit that is available locally. Best of all are the cherries. Their glossy, blood-red skin blushes in embarrassment of its beauty. The perfect handles, woody, thin and black; stick straight up, waiting for me like impatient children. A gentle clink can be heard as they tumble gently into a bowl like calm waves. Snatching one for myself, I finger the skin of silk between my fingers. I sink my teeth into the awaiting flesh, a gentle snap allowing the juice to avalanche, the delicious blood rushing evidence down my face. My teeth clinks against the boulder blocking the path to deliciousness, and I must restart; attacking form a different angle. The smell of summer envelops me now, and I polish off the fruit like an ice cream cone. Reaching for another, I let it dangle by the stem; one last dance in beauty before it falls into the taste trap, feeling bad, since this one is the queen bee. Golden and unique, with a hint of sass. If not for its blood spot, its one blemish, I might have left it alone. But no, the destiny is set, my mouth watering with the thought of a unique experience. Already exhaling the scent of cherry wood and berries, and my though tingling as the sweet river of juice slides across it. A holly jolly treat in deed. If only they weren't a seasonal treat!


http://www.cjolsoncherries.com/


Now we skip to winter. And what does summer have in comon with winter? Clouds. Increasingly more of them as the gloom of winter sets in. I love swallowing clouds. Moist, sweet, fluffy, flavorful clouds. That is marshmallows.Pillowy and delicate, they cast a spell on me. One minute i'm diving in - the next I've eaten a pile of them. Melt-in-your-mouth, yet inexplicably sturdy. White as snow, plush pink, chocolate brown. Any way you make them, I'll eat them. Or at least, I used to. I no longer get the luxury of a marshmallow spell, but instead have been virtually been zapped of my animal eating powers instead. Well okay, of my own choosing. And a happy choice its been I add.
But that still doesn't mean I don't want my marshmallows - one of the few treats that, temporarily, make the winter okay. Floating on top of cocoa like a boat gilding across a glassy ocean, they complete the picture.
And yet, my marshmallow cravings have been given the cold shoulder. All thanks to gelatin. Oh sure, there's agar. But making marshmallows with agar is like building a snowman out of white, icy powder- it'll work, but it definitely won't be the same. Someone has excelled, but for an arm and a leg and leaving my beliefs of homemade whenever possible behind. Plus I inherently want to know how to be able to make just about everything delicious.
They made a superhero out of EnerG egg, can't vegan gelatin be next in line?
Oh, and let's not forget the snow pudding to be served in t-21 days. What's to do about that?


http://www.sophistimom.com/homemade-marshmallows/


But alas, I don't have either cherries or marshamllows right now. I just have a fridge stocked with leftovers of a delicious "Sans Coq au Vin" feast, and a boxful of Almond Sandnuts ready to go to the vegan cookie swap tomorrow. Maybe that will make Christmas more real? Or maybe a dusting of snow? No, forget I ever said that- no snow. 50 degrees is perfectly fine with me. Though I suppose as long as my oven is cranking out goodies, I'm happy.


Almond Sandnuts. Soon to be on a passionbakes Etsy shop near you!

Wednesday, November 16, 2011

Tarts, Tests, and Tantrums

Ah finals. Hate them!

Reasons why I hate finals:
Stress.
Long weekends that only serve to make you stress more.
Knowing that you really don't have anything to worry about but you do anyway
A professor who thinks his study guide is a gift, but really just confuses you more
Buses that don't seem to care about being on time
Scantrons that should never have been invented
Teachers who don't seem to remember why you can't use Scantrons.
An overwhelming desire to scarf down every sweet thing in site in hopes of relieving your stress.

Oh yes, finals. Three times per year is three times too many.

But the one thing that might make finals a little better is knowing that a nice long breaks lies just 24 hours in the future. And even better, this break involves one great holiday- Thanksgiving.

So, in honor of Thanksgiving, and in need of emptying out the refrigerator of all my farmers' market finds, I decided to combine a few classic fall flavors into one great holiday pie. Of course, it's not even seven days away yet and, three days after making this delicious dessert, it's nearly gone. That's stress and a lack of breakfast eats for you!

Now go get ready and make this pie / tart / dessert / whatever you want to call it!


Pickin’ Pie
Note: I think next time I will caramelize or partially cook the apples before putting them on top of the squash filling (and will bake the filling for 30-40 minutes instead of 20 so that it doens't over-bake). The way I did it this first time, the apples came out kinda chewy.
Crust
132 g. sugar
18 g. molasses
120 g. flour
1/4 tsp. baking soda
1/4 tsp. salt
2 tsp. vanilla
60 g. rolled oats
76 g. Earth Balance stick margarine, cut into cubes
2-4 tbsp. apple cider
  1. Combine sugar, molasses, flour, baking soda, slat, vanilla and oats. 
  2. Cut in margarine with your hands, rubbing it until you get small, pea-like pieces of fat.
  3. Add enough cider to bring the dough together into a workable dough.
  4. Form dough into a disk, wrap and chill for 1 hour or overnight.
  5. When ready to bake, preheat oven to 400 degrees. Grease a 9” pie plate with high sides or a 9” cake pan.
  6. Roll dough out to about a 10” disk (easiest way is between plastic wrap). Transfer to the greased pie plate. Dough should come about 1/2 to 1” up sides.
  7. Bake 12-15 minutes, or until browned and firm to the touch. Meanwhile, prepare squash filling.
Squash Filling
2 cups butternut squash puree (from about half a small, roasted squash)
2 cups apple cider, cooked over medium heat until reduced to 1 cup
1 tbsp. molasses
1 tsp. cinnamon
1/2 tsp. ginger
1/2 tsp. nutmeg
1/8 tsp. cayenne pepper
5 tbsp. tapioca starch
1 tbsp. coconut oil or shortening


8 . Combine all filling ingredients in a blender, pureeing until completely smooth and evenly distributed.

9.Pour into baked crust. Bake at 350 degrees for about 20 minutes. Meanwhile prepare apples.

Apples
3 medium, semi-tart, firm apples (ex. Empire), peeled, quartered, and thinly sliced
3 tbsp. brown sugar
the juice of half a lemon
3 tbsp. tapioca starch
1 tsp. fresh grated ginger

10. Toss apples with all other ingredients. Let sit for at least 10 minutes (can do ahead of time and keep in fridge)

11. When filling is starting to set, remove pan from oven and arrange apples in a single layer on top. I arranged mine in sort of a rose pattern, overlapping apples slightly in rings, but you can do it however you like it best.


12. Bake for 15-20 minutes, or until apples have begun to brown.


13. Remove from oven and cool completely. Serve immediately or store in the fridge.


Great with banana "ice cream" (especially pumpkin-flavored)! Get the basic recipe here! Also great for breakfast!!!!


Oh and by the way: If you like all the great, creative treats I've shared on my blog, please check out my Etsy page! Thank you!


Monday, November 7, 2011

Bread Withdrawls


Today I'd like to talk about bread. And snowstorms. And power outages.

How are these all related? Well, if you are one of the unlucky people (i.e. me) who live in the Northeast Connecticut, you know that we had a freak Halloween snow storm last weekend. As in 10 days ago. As in still in October (not that it would have been any better in November or December or January of February or ever)! And if you are further still one of the unlucky people who lives in Farmington Connecticut, you'd know that we are mostly still without power.

Yes, 10 days without power.

Though I must say I am lucky in that respect; I'm not a high-school student anymore, so I don't have to be sitting home without power while my April vacation days get used up because we have no school. Instead I get to be in a nice college apartment, feeling rather weird as I talk to my parents on my cell phones since cable and phone services are also still out.

So I have power here at school. And power... well.. gives me power. The power to do so many things. Delicious things. Like baking bread. And then scarfing down the whole loaf of said bread in a matter of... 4 days?

Yeah, it's that good.

Actually, that makes the second great thing that came out of a power outage. Because there was a previous loaf of said bread, which started last Saturday morning, as the first flakes of winter snow were falling, along with a few precious branches of our new pear tree. Of course, me being me could not decide what to bake, except that I knew I needed to bake something for breakfast. Fast. Like before I couldn't any more.

The recipe I chose, called Amanda Bread (from America's Test Kitchen Baking book), needed to rise for a total of 3 hours. Add to that the time it was going to take me to veganize (and just generally Carinaize) it, and the 10 minutes of mixing, 40 minutes of baking... you get the point... kind of a risk under a time crunch.

So the power went off at minute 20 during baking.

Thanks to the bread goddesses, I kept the door closed on my bread and the oven finished its baking magic, creating a not-quite-brown but still delicious bread.

Fast forward 24 hours, the power still out, the loaf half gone, and my mom decides we should try getting me back to school. So we hurriedly get all my books and food together and head off. One thing we left behind- my delicious bread!

Withdrawals!!!! So much for the delicious toast I was looking forward to starting my week with!

Five long days later, I finally had some time to make more bread. And so my weekend started off with a great breakfast once again. Not quite as delicious as the first one (maybe the power outage is the secret to great bread after all? Or maybe it's just that I like cranberries and hazelnuts together better than almond and ginger? Idk). Now all that's left is 1" chunk; just enough for breakfast. Hence the bad picture. Trust me, it's delicious you won't be able to wait long enough for a proper photo!


Crazy Amanda Bread
(based off a recipe from America's Test Kitchen)

227 g. almond milk (or any other non-dairy milk, but almond provides the best flavor)
57 g. oil
78 g. coarse cornmeal
425 g. whole wheat flour (hey if you're going to eat so much of it, might as well get some fiber in!)
33 g. vital wheat gluten
2 tsp. salt
1/2 tsp. ground cardamom (optional)
1/4 tsp. ground ginger
76 g. lukewarm water
2 1/4 tsp. instant yeast
1 tbsp molasses
4 tbsp honey (or 2 tbsp. each agave and brown rice syrup to make it completely vegan)
1 heaping cup total add-ins (my favorite is equal parts toasted, chopped hazelnuts and plumped, dried cranberries)


  1. Microwave milk and oil until simmering. Stir in cornmeal, then microwave 15 more seconds, or until the cornmeal has absorbed the milk. Let cool to room temperature.
  2. Combine flour, vital wheat gluten, salt and spices in a stand mixer fitted with a dough hook.
  3. Combine water yeast, honey and molasses in a measuring cup.
  4. Add cooled cornmeal mixture to the flour mixture and mix on low speed for about 1 minute, or until combined.
  5. Still on low speed, slowly add the liquid mixture.
  6. Once all liquid is Incorporated, increase to medium speed and mix for 5 minutes.
  7. Add plumped fruit and/or nuts. Mix for an additional 6 minutes.
  8. Form the dough into a ball, then place in a lightly oiled bowl. Cover with plastic wrap. Place in a slightly warm oven and let rise for 1 1/2 hours, or until doubled.
  9. Remove dough form bowl onto a very lightly floured surface. Flatten slightly into a rough rectangle. Fold the top edge of the rectangle towards you, gently pressing into the center. Press the other side in as well so you have one, fat loaf.
  10. Place loaf in a greased loaf pan. Cover and proof for another 1 1/2 hours.
  11. Meanwhile, preheat oven to 350 degrees. Heat a pan of water in the oven to simmering.
  12. Once proofed, you can brush the bread with more oil and sprinkle with cornmeal or nuts, if desired. Bake, with steam bath in place, for 40-45 minutes, or until the top of the bread is lightly browned.
  13. Let cool in pan until cool enough to handle, then remove form pan to cool completely (you can keep it in the pan, but the bottom gets a bit soggy- but not enough to really bother me! Yum!!!


Sunday, October 23, 2011

Cracking the Coconut, among other things


Ever since Cupcake Hero died out, I've been on the hunt for any blog baking-related challenges. Finally I think I've found one! Vegan Mofo's Iron Chef Challenge.

There's just one problem.

I only got three days to do it!!!!!

Day 1: Ponder what to make
Day 2 Ponder some more, decide on what to make, then halfway through change your mind.
Day 3: Wait for your masterpiece to be at its peak of flavor and photo perfection and your mind at its best writing potential, then realize that the deadline is not 11 pm like most other Vegan Mofo deadlines, but 3 pm. What?

Well, might as well post it anyway. Because it's quite delicious, if I do say so myself. An quite unusual too. Part chocolate, part fruity, part creamy coconut and gelatinous panna cotta (side note; can someone please figure out a way to make agar agar more gelatinous and less grainy?), and with a slight hint of:

Curry!

Yes, I said curry. Now don't freak out! It's just a dusting. You put ginger on your mango, right? Well curry has that same kind of spicy kick, and we already know how friendly it is with coconut. So, here you have it: One great desert!


Curry Coconut Bombe

Beanie Brownie

85 g. bean puree
71 g. coconut oil
179 g. sugar
76 g, lite coconut milk
8 g. corn starch
1 tsp. instant espresso
1 tsp. vanilla
95 g. all purpose flour
32 g. cocoa powder
1/2 tsp. baking powder
1/8 tsp. baking soda
1/8 tsp. salt

Preheat oven to 325 degrees. Line a half sheet pan with parchment paper and grease lightly.
Puree beans in a food processor until smooth.
Add coconut oil and sugar and blend until smooth.
Blend in coconut milk, cornstarch, espresso and vanilla.
Gently blend in flour, cocoa, baking powder, baking soda and salt, just until combined (finish last bit of mixing by hand).
Spread evenly in prepared pan.
Bake 15-20 minutes, or just until set.
Cool completely.
Cut a 6" round of the brownie with a round cutter or the top edge of a 6" round pan. This will eventually be the bottom of your dessert.


Caramelized Mango

1 tbsp. oil
1 mango, peeled, removed from pit, and cut into 1/2" wide strips
about 2 tbsp. brown sugar
1/2 tsp. curry powder
1 tsp. fresh ginger

Heat a fry pan with the oil over medium high heat.
Add mango strips; they should sizzle as they hit the pan. Quickly add remaining ingredients and toss to coat.
Cook 1-2 minutes per side, until caramelized.
Remove from heat and let cool completely.


Coconut Panna Cotta

1/4 cup sweetened coconut
1 cup light coconut milk
1/2 tsp. curry powder
1 1/2 tbsp. agar agar powder
100 g. sugar
1 1/4 cup coconut water
3 tbsp. corn starch

Line a tall 6" round pan with plastic wrap, leaving excess at the top so you can pick it up easily.
Arrange 5 of the best looking mango slices in a star-like pattern on the bottom of the lined pan.
Toast coconut in a saucepan over medium heat, stirring constantly to prevent burning. Once toasted, add coconut milk and curry powder. Turn off heat and let steep for 5 minutes. Strain the coconut out of the milk, reserving for later.
Add agar powder to the infused coconut milk, whisking as you add it. Bring to a boil, whisking constantly. Reduce heat slightly, then simmer for another 5-10 minutes, or until agar is completely dissolved.
Add sugar and cook until dissolved.
Dissolve corn starch in the coconut water. Slowly add to boiling agar mixture, whisking constantly.
Bring mixture back to a boil.
Remove from heat and pour into prepared pan.
Working quickly, place the cut round of brownie on top of the custard. Cover and chill overnight, or until set.
When ready to serve, invert dessert onto a plate. Remove plastic wrap and garnish with reserved coconut.

Wednesday, October 12, 2011

Late Blooms


Ok, I know what you're thinking. You're thinking that you've given up on me- the spontaneous blogger who has way to many ideas choose form and can never choose one to write about. Okay, so that's all true- but I'm also a student with a busy life. But know one thing readers, you are on my mind.

So, amidst all the piles of homework, recipes awaiting conversion to be made for a soup-kitchen crowd, and endless ideas that are limited by my financial and experiential status- I am pausing my life for a few moments to share some culinary inspiration with you.

Since I've come back to Providence (very very, very sadly and begrudgingly), I've missed the variety of ways that Portland has to satisfy a vegan's palate. So, for better or worse, I've had to turn to my own culinary devices and creativity. Meanwhile, my sweet-mates are wondering what all the clatter is and why I can possibly be baking something new nearly every day. Oh and they are probably also wondering how I got peaches from a farmer's market in October. Yes, I said peaches. Sweet, juicy, overripe peaches. Blame my mother for that one. Alas, despite my sincere efforts to buy locally- the peaches for my latest creation did not come form a Providence farmer's market, but from Stew Leonards. Though I guess that's better than getting them frozen or even form Stop & Shop.

So, what did I do with a hankering for dessert, a basketful of bruised peaches, and a brain chock full of ideas? I made pie. Not cupcakes, not cookies, but pie. Well, ok, a tart, but close enough (and maybe next time I'll make a pie crust anyway- I think that might have a better texture). And, ok, I did make mini versions, in the form of cookies, afterwards. But the idea itself, purely pie.

For some reason, I have been craving a vegan lemon meringue pie lately. But I had several problems:
1) I don't have enough lemons to make an extra lemony lemon filling for said pie
2) I haven't been able to successfully make a vegan lemon curd that is rich enough to taste like the real thing
3) I wanted something unique
4) I had 5 peaches that got a little too bumped around and needed to be used fast
5) Ever since I'd had a taste of one great peach pie made by a certain sweet-mate (not vegan by the way)- I've been craving it (and yes, I did consider that the few pies I've made in my life are pretty much limited to Pie & Tarts lab freshman year).

Oh, and I did have one more nagging reason.... I wanted to satisfy another spot in the "State Cookie Lineup" that I could post on my new and growing Etsy page (please check it out!!!!!) - I'm trying to post the most unique, fresh, flavorful products first. Ok, so I guess there were ulterior motives....

Anyway, I set about constructing this pie. I knew I wanted something a bit risky... hence the vegan meringue topping instead of a second pie crust (I've had ups and down getting good quality vegan meringue- this time I succeeded!) I also knew I wanted to keep the filling simple- peaches, brown sugar, some sort of starch... maybe a flavoring or two, and that's it.

The last piece of the puzzle was the crust. I wasn't quite in the mood for waiting for pie dough to chill (because then I'd have to wait all the way until tomorrow to roll it out- who wants that?)... and the sugar addict that I am didn't want to savory quality of a traditional pie crust. And then there's my conscience, which wanted some sort of excuse to think this dessert was healthy.

So, I opted for a simple, press-in pie/tart crust, with a blend of almond flour, whole wheat flour, and a hint of sugar for just the right flavor balance.

Put all the components together, add some heat, a bit of broiling to give the camp-fire, "toasted marshmallow" appeal, and you have one great dessert everyone, vegan or not will be raving about. Just be sure not to forget you pie is under the broiler!


Vegan Peach Meringue Pie (and Alabama Cookies)
Yield: 1 9” tart or pie (for pie, make twice as much peach filling)

Crust
(Based off “Samoa Tart” recipe from Vegan Desserts: Scrumptious Sweets for Every Season by Hannah Kaminsky)

140 g. whole-wheat flour
40 g. almond meal
10 g, granulated sugar
Pinch of salt
50 g. (¼ cup) canola oil
57 g. (¼ cup) non-dairy milk (preferably almond milk)
1 tsp. vanilla extract
½ tsp. almond extract

1.  Preheat oven to 350 degrees. Lightly grease a 9” tart shell with removable bottom of a heavily grease a 9” pie plate.
2.  Sift dry ingredients.
3.  Add wet ingredients, mixing just until combined. Knead gently if necessary to help dough come together.
4.  Press dough into greased pan, starting by making an even layer of crust on the bottom, then working it about an inch up the side.
5.  Poke the bottom of the crust several times with a fork to prevent puffing. Bake for 12-15 minutes, or until set. Meanwhile, prepare peach filling.


Peach Filling

5 medium peaches, sliced thinly (peeled or unpeeled - your choice)
100 g. (1/2 cup) brown sugar
48 g. (6 tbsp.) tapioca starch or cornstarch
1 tbsp. fresh lemon or orange juice
1 tsp. vanilla extract

6.    Toss the peaches gently with all other filling ingredients, coating evenly.
7.    Dump filling into baked crust, evening out the top.
8.    Bake 30-40 minutes, or until filling is reduced and thickened. Cool to room temperature.


“Meringue”
(Based off “Meringue Kisses” recipe from Vegan Desserts: Scrumptious Sweets for Every Season by Hannah Kaminski

¼ cup EnerG Egg Replacer
½ cup plus 1 tbsp. hot water
75 g. (6 tbsp.) granulated sugar
½ tsp. vanilla
½ tsp. almond extract or 1/4 tsp. amaretto flavoring

9.    Combine EnerG Egg and water in the bowl of an electric mixer (make sure it’s clean!), fitted with a whip attachment. Once incorporated, increase speed to high, and beat for 5 minutes, or until tripled in volume and peaks have formed.
10.With mixer still on high speed, slowly stream in the sugar, letting it incorporate fully. The entire process of adding sugar will take about 5 additional minutes.
11.Remove form mixer and fold in extracts.
12.Pipe or mound meringue on top of peach filling, covering all of the filling but only the inner edge of the crust (otherwise the meringue may droop over the edge of the tart).
13.Broil the pie for 1.5 to 2 minutes. Be careful, the meringue burns fast! (I had mine in for 2.5 minutes the first time and the entire top burned. I was able to peel it off and add a little more meringue and broil again. That time I only did it 1.5 minutes and it was slightly droopy, so I would go another 15-20 seconds next time).
14.Cool back to room temperature and then serve. Can be stored at room temperature for a couple of days. I don’t think the refrigerator would be kind to this dessert.